
Watercolor Backgrounds PreClass
Welcome to the PreClass session for this class! This lesson includes information about supplies both needed and recommended for class.
Before we start…a little housekeeping
I retain the copyright to the content you are learning in class. That means…
- Do not sell or give away the concepts from my classes – you may not re-teach my instruction contained or created within these lessons.
- Do not post a video tutorial or step by step photo tutorial of your own redraw of class content.
- Do not repost any handouts you receive in class.
However…I love to see students making strides and taking this teaching and personalizing it with your own skills.
- DO make your own designs and develop your own style! I love that!
- DO gift your creations made with these techniques, of course!
At the bottom of each lesson you’ll see some ways to share your homework and ask questions, so that’ll be handy for you.
Video: Supplies
Note that you can likely try out the supplies you already have for this class. You can also use whatever colors you desire – change it up from the colors used in the examples.
Paints
Daniel Smith Watercolor tubes are what I use…no need to get these! I’ve changed my palette several times over the last few years….so it’s all personal preference.
- 6 Essentials Set — two reds, two yellows, two blues BLICK AMZ JACKSONS
- My crafty palette (brighter colors):
- Nickel Azo
- New Gamboge
- Aussie Red Gold
- Yellow Ochre
- Burnt Sienna
- Burnt Umber
- Perylene Maroon
- Anthraquinoid Scarlet
- Pyrrol Scarlet
- Quinacridone Rose
- Imperial Purple
- Moonglow
- Cobalt Teal Blue
- Iridescent Electric Blue
- Cobalt Blue
- French Ultramarine Blue
- Phthalo Blue GS
- Indanthrone Blue
- Serpentine Genuine
- Sap Green
- Green Apatite Genuine
- Perylene Green
- Payne’s Blue Gray
- Neutral Tint
Other brands I’ve used that are just fine for cards
These aren’t lightfast, but for most cards that’s not urgent. They have decent selections of colors for an affordable price, but since they’re less transparent and can appear a little chalky, they may not perform the “tricks” you’ll see in a few of the lessons as they’re craft-grade, not artist-grade paints. But try them out for sure, as well as any other watercolors you have!
Brushes
For decent brushes at an affordable price, I recommend the Silver Brush brand, the line of Black Velvet brushes. You’ll want to have surprisingly big ones for backgrounds; using a tiny brush that can squeeze into stamped shapes will not help you cover a whole background.
For stamps you may want smaller brushes, of course, though I always suggest using the largest one that can accomodate what you’re painting. A small brush will hold less pigment and water and cause all kinds of trouble. These brushes aren’t shown in this class, but are discussed in the sample section of some of the lessons.
Paper
Ahhhh the paper! While many beginners say, “I’m no good at this, I don’t want to waste good paper!” that will cause you troubles; you won’t be able to accomplish a beautiful watercolored edge on yukky paper, so I recommend treating yourself to a pad of the good stuff. Compare its results to trying it on the cheap stuff, and you’ll be sold.
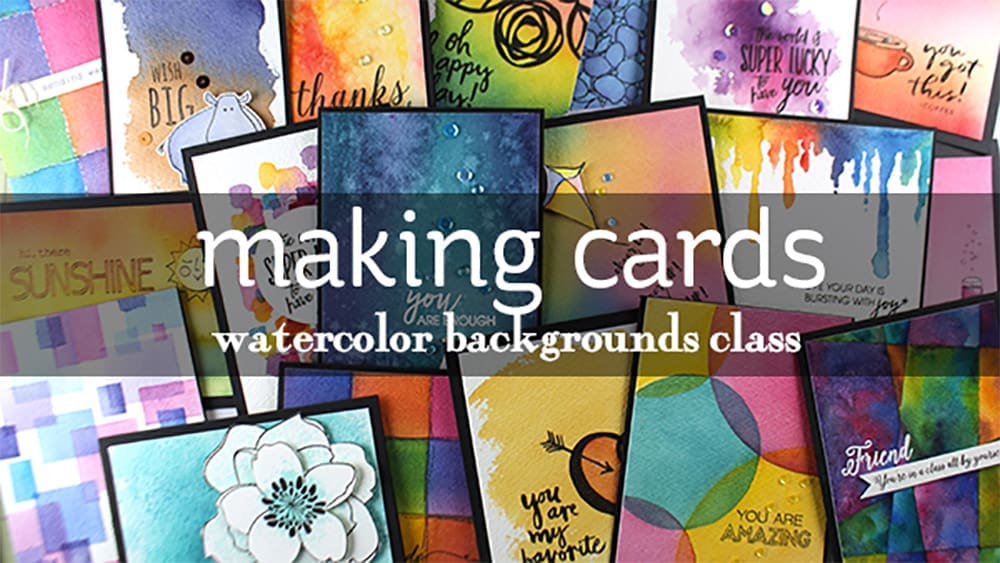
Making cards
This class does not cover the creation of cards in the videos. The backgrounds are taught, then below each video, finished cards are shown and a description is provided with basic tips. You can use these backgrounds along with any of the card design videos you find on YouTube!
TIP: Once you complete some practice pieces, start a stash of backgrounds to grab when making cards at a later time, OR find some stamps to use and create a card as soon as your paper is dry!
All backgrounds created in videos for this class were mounted onto black cardstock as they were completed. Then all in one day, they were turned into cards using these stamps to finish them all off. You can use stamps you already have to make cards – flowers, hearts, sentiments, etc. Or if you really love just that background, put a sentiment on the inside, and send the card out as a small piece of art! (This can work REALLY well for sympathy cards that are so hard to make already.)
Stamps used in this class have been discontinued since 2017 when it was filmed.
Other tips for watercolor cardmaking
- Adhesive: Watercolor paper is textured – so I recommend using a really strong adhesive. I use either Be Creative/Scor Tape or ATG tape in generous quantity – and these tapes are by far stickier and more permanent. For extra flattening, adhere watercolor paper onto a base piece of cardstock, then attach that cardstock with any of your favorite regular adhesives. Both foam tape and Xtreme tabs are sticky enough for watercolor paper.
- Ink: If you’re just stamping on top of pre-painted paper and don’t need to add any more water, you can use any ink. It’s only BEFORE painting that you need to be sure it’s waterproof ink.
- Embossing: Be sure to use a powder tool to prepare your watercolored paper for embossing. This removes the static from the paper so when you shake on the powder, it’s less likely to stick.
- Stamping: A MISTI stamping tool can really be helpful when stamping on watercolor paper because it allows for repeated stamping. Watercolor paper is textured and can require some extra attention.
Quick links to share your work wherever you like:
Artventure Community
Artventure is an active art community of thousands of artists that I run on Mighty Networks via an app or the web. You’ll be right in my pocket for quick feedback and answers to questions and bonus zoom calls! Free to join.
Social media & blogs
Post wherever you like to share, and tag @sandyallnock – I love to see your work! Posting lets your friends know which class you’re taking. They might enjoy learning as well!
Discover more from Art Classes
Subscribe to get the latest posts sent to your email.